Leak Detection Kit


Leak Detection Kit Setup Via Fusion
In this Get Started Guide we’ll show how to configure the FMM as a leak detection module. The FMM has four front ports to accept four leak detection probes. Plug one end of the included AquaBus cable into either of the AquaBus ports on the FMM and the other end into an available AquaBus port anywhere on your existing Apex system. It makes no difference which AquaBus port is used and you do not need to power down the system when connecting AquaBus accessories as the system is plug-and-play.

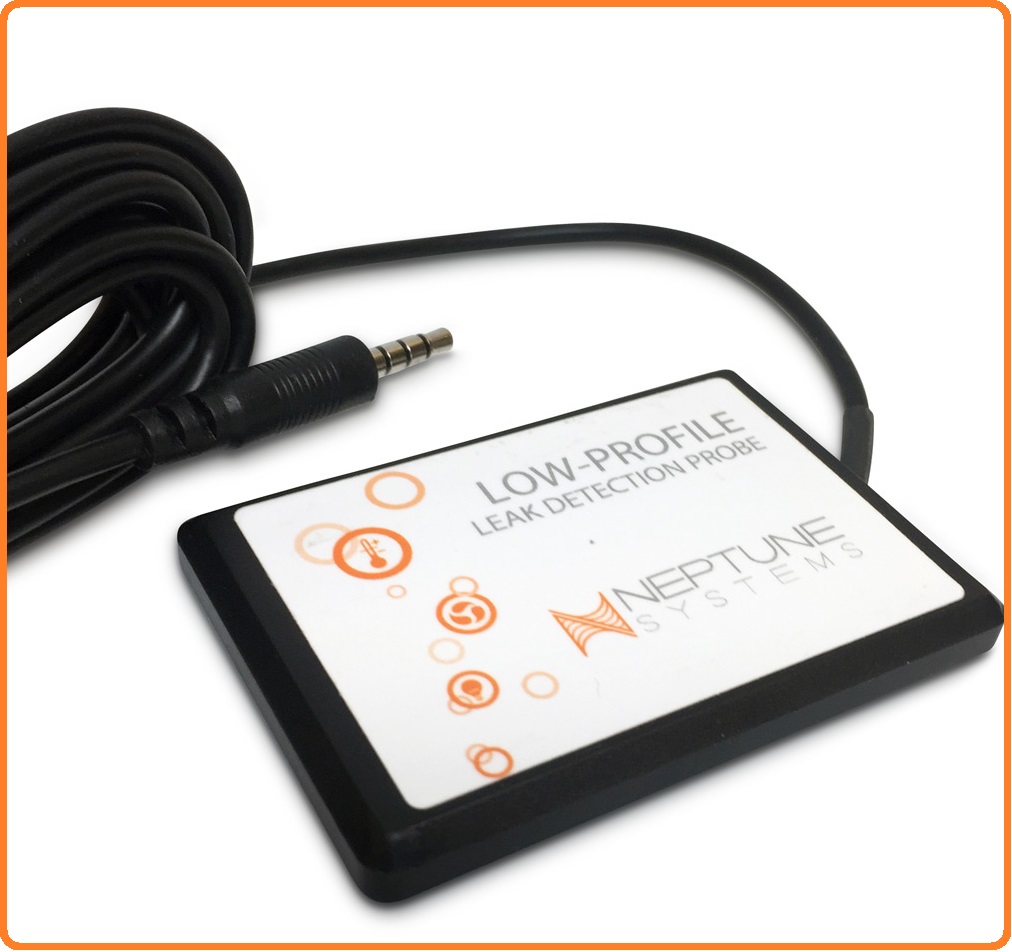
Solid Surface and Low Profile Leak Detection Probes (With 3.5mm Plug)
The Leak Detection Kit includes 2 Solid Surface Leak Detection Probes. it is designed to be placed on solid flat surfaces. This probe is perfect for inside the bottom of your aquarium cabinet or on the floor nearby. The probe is weighted so that it sets flat on any solid horizontal surface.
Optionally, you may add a Low Profile Leak Detection Probe. This probe is only about 1/4″ thick so it may be easily slipped under the edge of carpeting.
The FMM has four sensor ports, so you may add 1 or 2 more of either type.
IMPORTANT LEAK DETECTION PROBE PLACEMENT NOTES
- Residual moisture in concrete may cause false alarms. It is recommended that a leak sensor not be placed directly on a bare concrete slab. Instead, use a folded up paper towel or a thick piece of cloth between the probe and the concrete.
- In the event of a leak or spill in a carpeted area, the top of carpet may remain dry even if the carpet padding and lower part of the carpet are saturated. Therefore, a leak detection probe should never be placed on top of carpet. Instead, use a low-profile leak probe, lift the edge of the carpet and padding a bit and slip the probe underneath.

How to Setup Your LDK Using the APEX Fusion LDK Task
After you first connect your FMM to your Apex system, you can click on the Task Icon ![]() located on the APEX Fusion Dashboard and choose the LDK Task from the list. This will walk you through these simple steps for setting up the LDK:
located on the APEX Fusion Dashboard and choose the LDK Task from the list. This will walk you through these simple steps for setting up the LDK:
- Connect the FMM
- Select the FMM being used for the LDK if you have more than one FMM connected to your Apex system
- Plug the probes into the FMM ports
- Send the updated configuration to the Apex
When you have completed running the LDK Task, your Apex will have been configured to send an alarm notification if a leak or water on the floor is detected.
- You can test a leak detection probe by placing the probe on a wet paper towel. You should get an alarm notification shortly thereafter.
The remainder of this Get Started guide is for those who want to learn more, who want do the LDK configuration manually, or who desire any Apex outputs other than the email alarm to be controlled if there is a leak or water on the floor detected.

How to Find and Identify Your LDK Probes
When you first connect your FMM you will have five new tiles on your Apex Fusion Dashboard. Four of the new tiles correspond to the 4 FMM ports, and will have a name in the format of SWX_#_*, where # is the Apex AquaBus address of the FMM and * is the number of the FMM port (1-4). All 4 tiles will appear even if a probe or other type of sensor is not plugged into every port.
The fifth tile is for the 24V ACC port, which will have a name in the format of LinkA_#_1, where # is the Apex AquaBus address of the FMM. The ACC port is not used for a basic LDK installation.
If you do not see the 5 new tiles on the Dashboard, they might be found in the unused tile area, which you can open by clicking the button that looks like a padlock in the top right of the Apex Fusion dashboard; you can then drag the desired tiles out onto the dashboard. If you will be using only the two leak detection probes included with the LDK, you should leave the SWX_#_3 and SWX_#_4 tiles in the unused tiles area or drag them into the dashboard if they are already on the dashboard. Place or leave the ACC port tiles (LinkA_#_1) in the unused tile area as well.

Connecting your LDK Probes
Now that we have the sensors placed on the Dashboard it’s time to connect the probes to the Fluid Monitoring Module. Above each port on the FMM is a label. The label reads as follows:
- 1
- 2
- 3
- 4
- ACC (not used for LDK setup)
- PWR (not used for LDK setup)
These labels will help you identify which FMM port corresponds to which switch input on the Dashboard (SWX#_1 – SWX#_4).
The leak detection probes work by switching between two conditions – a leak sensor’s switch input is either OPEN or CLOSED. This OPEN or CLOSED state will be shown on the dashboard tile for each leak detection probe.
OPEN = DRY
CLOSED = WET
- You can test the probes by placing the the leak detection probe on a wet paper towel. You should see the ‘SWX#_y’ switch on the APEX Local Dashboard (for Apex 2016) or the Classic Dashboard (for Apex Classic models) change from OPEN to CLOSED. Note that it may take up to 20 seconds for the dashboard to refresh and update the status of tiles.
- Residual moisture in concrete may cause false alarms. It is recommended that a sensor not be placed directly on a bare concrete slab. Instead, use a folded up paper towel or a thick piece of cloth between the probe and the concrete.

Email and Text (SMS) Alerts
If you have already run the APEX Fusion LDK Task, you do not need to repeat the steps in this section. This section is for those who prefer to set things up manually, or who simply want to learn more.
Your leak detection probes need to be tied to an alarm outlet in order to be notified if there was an alert. You should have already configured your email address and/or cellular phone number in your “Fusion Notifications.” Please refer to the APEX Fusion Get Started guide if you have not yet set up notifications.
First, we will program our email alarm output.
1. Click on the ‘Expand’ Icon ![]() and then the ‘Outputs’ Icon
and then the ‘Outputs’ Icon ![]() on your Apex Fusion Dashboard, then select the email output – its default name is ‘EmailAlm_I5’.
on your Apex Fusion Dashboard, then select the email output – its default name is ‘EmailAlm_I5’.
2. Add program statements for the two leak detection probes to the end of the existing programming, like shown below by the blue lines :
Set OFF
existing programming
If Swx#_1 CLOSED Then ON
If Swx#_2 CLOSED Then ON
Add lines for Swx#_3 and/or Swx#_4 if you have added additional leak probes. In the example given here, the # corresponds to the AquaBus address of the FMM;
Second, we will program one of the two audible alarm outputs. (This only works if an Apex display module is connected)
1. Click on the ‘Expand’ Icon ![]() and then the ‘Outputs’ Icon
and then the ‘Outputs’ Icon ![]() on your Apex Fusion Dashboard then select either the audible alarm output (the default name is SndAlm_I6) or the audible warning output (the default name is SndWrn_I7).
on your Apex Fusion Dashboard then select either the audible alarm output (the default name is SndAlm_I6) or the audible warning output (the default name is SndWrn_I7).
2. Add the same statements for each connected leak detection probe as you did for the email alarm output.


Programming Energy Bar Outputs
Let’s look at an example for turning off an EnergyBar outlet if a leak or water on the floor is detected.
1. Click on the ‘Expand’ Icon ![]() and then the ‘Outputs’ Icon
and then the ‘Outputs’ Icon ![]() on your Apex Fusion Dashboard.
on your Apex Fusion Dashboard.
2. Click on an EnergyBar outlet you would like to have turn OFF when a leak probe detects water.
Note: Your return pump, ATO pumps, etc. would be a good outputs to have turn OFF if a leak is detected by the probe(s).
3. Switch the ‘Control Type’ to Advanced. You will see the programming window below open for you to add new programming. Add the lines below to it to the end of your current programming.
existing programming
If Swx#_1 CLOSED Then OFF
If Swx#_2 CLOSED Then OFF
Notice in this example we have changed the ending result to ‘OFF’ instead of ‘ON’ like used in the email program. This is because we want this Energy Bar outlet to respond to leaks by turning ‘OFF’.
Add lines for Swx#_3 and/or Swx#_4 if you have additional leak detection probes.
Renaming Leak Probes
It is entirely optional but highly recommended that you rename the leak detection probes so that they have more meaningful and descriptive names. Probes may have names up to 6 characters long, and may include upper- and lower-case letters, numbers, dash (-) or underscore (_). Some examples of good names for the LDK leak detection probes:
- LEAK1, LEAK2
- LDfrnt, LDback
- LeakL, LeakR (for probes positioned on the left and right inside your tank stand or beside the tank)
- LDreef, LDfrag (for probes positioned near or under two different tanks, such as a reef tank and a frag tank
Apex (2016) owners: You may rename probes and other inputs by using the Inputs page in either APEX Local or APEX Fusion. Click the desired input to select it, then edit the Name field. Click the orange cloud (Update) button when done.
Apex Classic owners: You cannot rename inputs using APEX Fusion. You may rename probes and other inputs using the Classic Dashboard. After accessing the Classic Dashboard, go to Configuration->Probe/Input setup, select the desired input from the drop-down menu, then rename it. Click the Update Settings button to save the new name to the Apex.